Showing posts with label pattern. Show all posts

Friday, August 10, 2018

Project Focus: Monmouth Caps

Monmouth Caps, Elsa Style

elsa@hailmog.org

I like to remember why I get myself into rabbit holes, and this is an important one in my personal and SCA life. 


This was one of my all-time favorite projects, for a friend with a Norse persona. The hat itself is wool; the horns are cotton, stuffed with fiberfill - and removable. The white dots around the brim are counted to 6, to imply Baronial status in our Kingdom - recipient was a retired Territorial Baron of Northkeep. 

No Kidding, There I Was, watching my younger brother stumble in the front door around Fall, 2010, covered in concrete dust, wearing only two layers in the beginning chill of fall. And I said to myself, "Self, my little brother is going to get himself sick by working construction without proper head covering in the coming cold and rainy season." So, I got working on an answer to this problem. 

I needed a style that was acceptable to modern aesthetics (because, my family still isn't quite sure about my weird "nerd hobby"), plus respectable to a garbed community (because, my "nerd hobby" is important to me, and I want it to be warmed and fed). All to the Glory of MOG if I could foist upon my brother a case-in-point about how medieval things aren't necessarily weird, and can be quite functional and attractive in everyday life.

So, I made my brother a Monmouth cap.

Pile of "Libby Hats" for a friend's Elevation to the Order of the Pelican - she wanted them as largess for the friends who helped her set-up and run her vigil area, since the vigil/elevation were at an event in the middle of winter. 
Then, his coworkers, who were also my friends working outdoors in the gathering cold, wanted hats. And then more of our mutual friends also wanted hats. And then SOs and other family members also wanted hats. And then it was just the reasonable thing to do to make up a bunch of spare ones in Liondragon Guard colors just in case. I quit counting (but kept knitting) at 400. 

This hat style is a treasure: simple, clean lines; looks acceptable (cozy, even) in modern company; has street-cred for medieval-recreation company; warm-but-not-overheaty in brisk temperatures; easy care; not itchy. 

Citations - aka Historical Street-Cred: 

This stylish cap follows a fashion phenomenon mentioned by Shakespeare (Henry V, Act IV, Scene 7) among others. Identifying features include a hemmed brim, a loop at the back, and a button on the top, and was often felted. I omit the button (simplicity) and felting (materials), but (mostly) maintain the silhouette (right shaping, wrong thickness). 

Jennifer L. Carlson. "A Short History of the Monmouth Cap."
Mistress Talana's site was the first I looked up, because I have seen her work "in the wild." I learned how to create these caps from her descriptions and photographs. Her historical analysis includes a discussion with a living history researcher at Colonial Williamsburg. 

Caleb Johnson's Mayflower History. "Things the Pilgrims Brought on the Mayflower."  
The provisions list cited by Mayflower historians is my favorite document to reference when I talk about these hats: this cap style was so "in" that it was referenced by name, recommended for settlers coming to the New World.

Getting Started

Yarn: 
  • Medieval: Coarse-spun wool, around "bulky" weight. Manufactured in the Monmouth region of Leistershire (I think that's right-ish). [will add citation next time I fall down that rabbit hole] 
  • Talana style: LionBrand, Wool-Ease Thick and Quick
  • Elsa style: LionBrand, Hometown USA, Super Bulky Acrylic Yarn; wash cold, air dry. 
Colors:
  • Medieval: brown or red, monochromatic.
  • Talana style: monochromatic; whatever she had on hand, or tailored to the person/occasion
  • Elsa style: dual-chromatic; whatever I have on hand, or tailored to the person/occasion 
    • MC = Main Color - Crown
    • CC = Contrast Color - Inside brim and hanging loop
Needles: 
  • Medieval: Probably double pointed needles (DPNs) of metal wire.
  • Elsa style:  Size 11 (circulars with 16” cable are nice). For kids hats, I use exactly this pattern but on size US 10.5 DPNs. 
Pick-up Tool 
  • Medieval: I imagine this was handled with another needle, but haven't seen anything definitive.
  • Elsa style: I like a crochet hook for this (sized around G-J, doubles as finishing tool). 
Finishing Tool 

  • Medieval: no idea. Finishing work is hidden, and when complete, unremarkable. 
  • Elsa style: Same crochet hook as above, large enough to snag most of the strand to secure it to the WS fabric. 


Elsa Hat Directions:
  • In CC, leave a tail about the length of your arm – fingers to shoulder. This will be the hanging loop. You might want to finger-crochet the tail to make the length more manageable while you’re working around it.
  • Cast on 48 sts. 
  • PM and join in round. Knit 5 rounds, weaving the tail between rows. 
  • Purl 1 row.  The tail should hang out the RS. Cut the yarn, leaving a tail to join the next color. 
  • Join the MC, and knit 5 rounds, maintaining the tail on the RS.
  • Free up the tail. Pull it snugly along the CC brim rows, and finger-crochet the length evenly - it should be long enough to wrap around two fingers in a closed loop. Leave about 2 inches of tail after securing the chain. Pull the tail through the fabric (at the purl seam is a nice place) and secure it on the WS. (I usually tie it and also weave it into the purl bumps for security overkill.)
Take a deep breath – this is the tricky part: 

In less alarmist terms: this is a three-needle join.
  • Use the crochet hook (hook end leading) to pick up 6-8 stitches of the cast-on row. Hold the crochet hook and left needle parallel, WS together. (The purl row should make this look natural.)
  • K2tog across, using one stitch off the crochet hook and one stitch from the needles. Keep working until all stitches of the cast-on row are secured – this will seal up the hemmed brim. (The last one or two k2togs will probably be a little wonky - mine still are, and I don't have a clever answer for that.)
It's all smooth sailing from here!
  • Knit even for 18 rows.
Shaping: 
  • (K4, k2tog) to end of row
  • Knit 2 rows
  • (K3, k2tog) to end of row
  • Knit 1 row
  • (K2, k2tog) to end of row
  • Knit 1 row
  • (K1, k2tog) to end of row
  • (k2tog) to end of row - 8 sts

Cut yarn and thread the tail through the live sts. Pull snug and dress on WS.

Enjoy!
Pelican-style Monmouth Cap. I started making this style for that same aforementioned friend on the occasion of her Elevation to Pelican, which coincided by the same-order Elevation of another friend - the timing simply spoke to me. 


Monday, May 21, 2018

Project Focus: Homespun Knock-Down

This One Time, at Spin Camp

To jump to the punch line: I've been spinning yarn (drop spindle; wool, silk, cat hair) in drips and drabs for a few years now, and have accumulated decent yardage of 2-ply yarns. Some bits of yarn have gone on to permanent existence in weaving projects, and some are waiting patiently for me to get around to their One Thing.

Other bits of yarn were just novelty purchases that never told me what they wanted to be when they grew up. It was fine when spinning was my focus in its own right - I had an overall yardage goal based on weaving, and anyway, hoarding "fresh" yarn is pretty rad! But then I started having other ideas for my time, and now I need to find space for the next round of projects.

I'm stuck in this corner:
If I talk about how I don't particularly love this yarn that I spun, I get lots of offers to take it from me. I've been that person, and I don't trust past-me to actually use the yarn in a way that current-me would appreciate.

And: I know for-sure that not-me-at-all will not appreciate my homespun yarn the way current-me does, warts and all. For example, at one point, I seriously got teary-eyed over this yarn's potential, like it was a kid growing up. Ludicrous, but it's my ludicrous. Call it "personal investment."

When yarns have been clear with me about what they want to be, the whole work is a joy, even when we disagree about a particular nuance of technique.

In the meanwhile, this yarn didn't know its own mind. When I started pushing the issue, it pushed back. "Bad as a kid," as my mom would say about any little thing (including the cats) pitching a fit about not getting its own way - especially when it doesn't want to clarify what it DOES want. Oy.

This yarn collection spans traditional gauges from superfine lace to super bulky, and I want it ALL to leave yarn storage and move into fabric storage. My summer "spring cleaning" plans this year include reimagining my living room blanket storage. I want more blankets/shawls for my living room - it's drafty in the fall/winter/spring ie knitting season, and if I can find them reliably, I can also grab them for events, etc.

In the meanwhile, I started being more consistent in taking photos of my projects on January 14, 2018, as part of an arts and sciences challenge you're welcome to join, with no commitment: 100 Days of A&S - take/post photos of your arts/sciences every day. It's surprisingly difficult!

One of the complications in finding 100 things to photograph over as many (or maybe more) days is making visible progress in anything. That's especially tricky when I keep ripping things apart! Midway through this exact project, my sister mentioned that she liked seeing all the iterations - my tenacity in trying to get it "right" and the variations I've explored. And it occurred to me that I have a blog already set-up that I could use to collect those thoughts. So. Here we are.

Round 1: House Coat. FIGHT!

Theory #1: Looong Jacket
2016 - January 2017

"This one time," I surveyed my holdings and discovered plenteous yarns I loved, but that were without purpose. And I wanted them to reach their full potential.

Or maybe more truthfully, I wanted more space to buy or make yarn a la the model: Use it Up, Wear it Out, Make Do, or Do Without.

I routinely disallow myself to buy yarn when I've got a backlog I don't know how to use. A few years prior, I used momentum from a similar review to purge all the "weird" yarn from my house. I ended up evicting 10 full tall kitchen trash bags. Yeah, not kidding.

Mission:Use Up the Yarn. Challenge Accepted!

I considered making a huge drapey coat, in garterlac. That would use up lots of yarn in a way that was functional and so pretty. I started, using only what I knew in my head. I had a nice entrelac pattern from my sister: Criminy Jicket's Garterlac Dishcloth. And I've successfully knitted a sweater (I like the shaping quite a bit, but I don't love how I did the color-work, so I rarely wear it). And I do some clothing-sewing, so I understand how garments come together (in theory).

But, the more I worked on this stash-busting project, the more we fought, the yarn and I. First, it made me decide whether I wanted to use my homespun yarn, or if I wanted a more uniform texture. Grudgingly, I settled on using store-bought yarn. Even then, it didn't want to conform to my expectations of being a jacket - it wanted to be a flat blanket, possibly for taking a luxurious nap on the couch. And then it wanted to have opinions about every color change. It did let me talk it into accepting one white strand of acrylic with a silver metallic thread spun in. Self-contained, non-shedding glitter.

Look how pretty that is!! It's long and narrow and squishy - oh yes, and drapey. And it used up a significant pile of yarns. We get along so well, since January 2017 - now that it's all done and functional and unique, and even visually striking.

Garterlac blanket, mostly using Hobby Lobby's "I Love this Wool," from back when that yarn was actually 100% wool. 

And then it was summertime in Oklahoma, when it's too hot to live, and when it's really hard to imagine wanting to touch things that make you feel WARM. It's not unheard-of for temperatures to reach 110 degrees Fahrenheit in high summer. Ew.

And then fall again: the crisp bite in the air that says that textiles could be lovely and decadent - even the wool ones.

Theory #2: COAT!!!1!1!
Fall 2017

This time, when I evaluated my remaining use-up yarn, most of the collection was yarn I'd spun. And I still wanted a jacket-type something that would hold itself in place regardless if I hopped up to switch laundry, or whatevs. And I thought I'd learned lessons from the blanket, on how my next try could be a coat. And I ran with it.


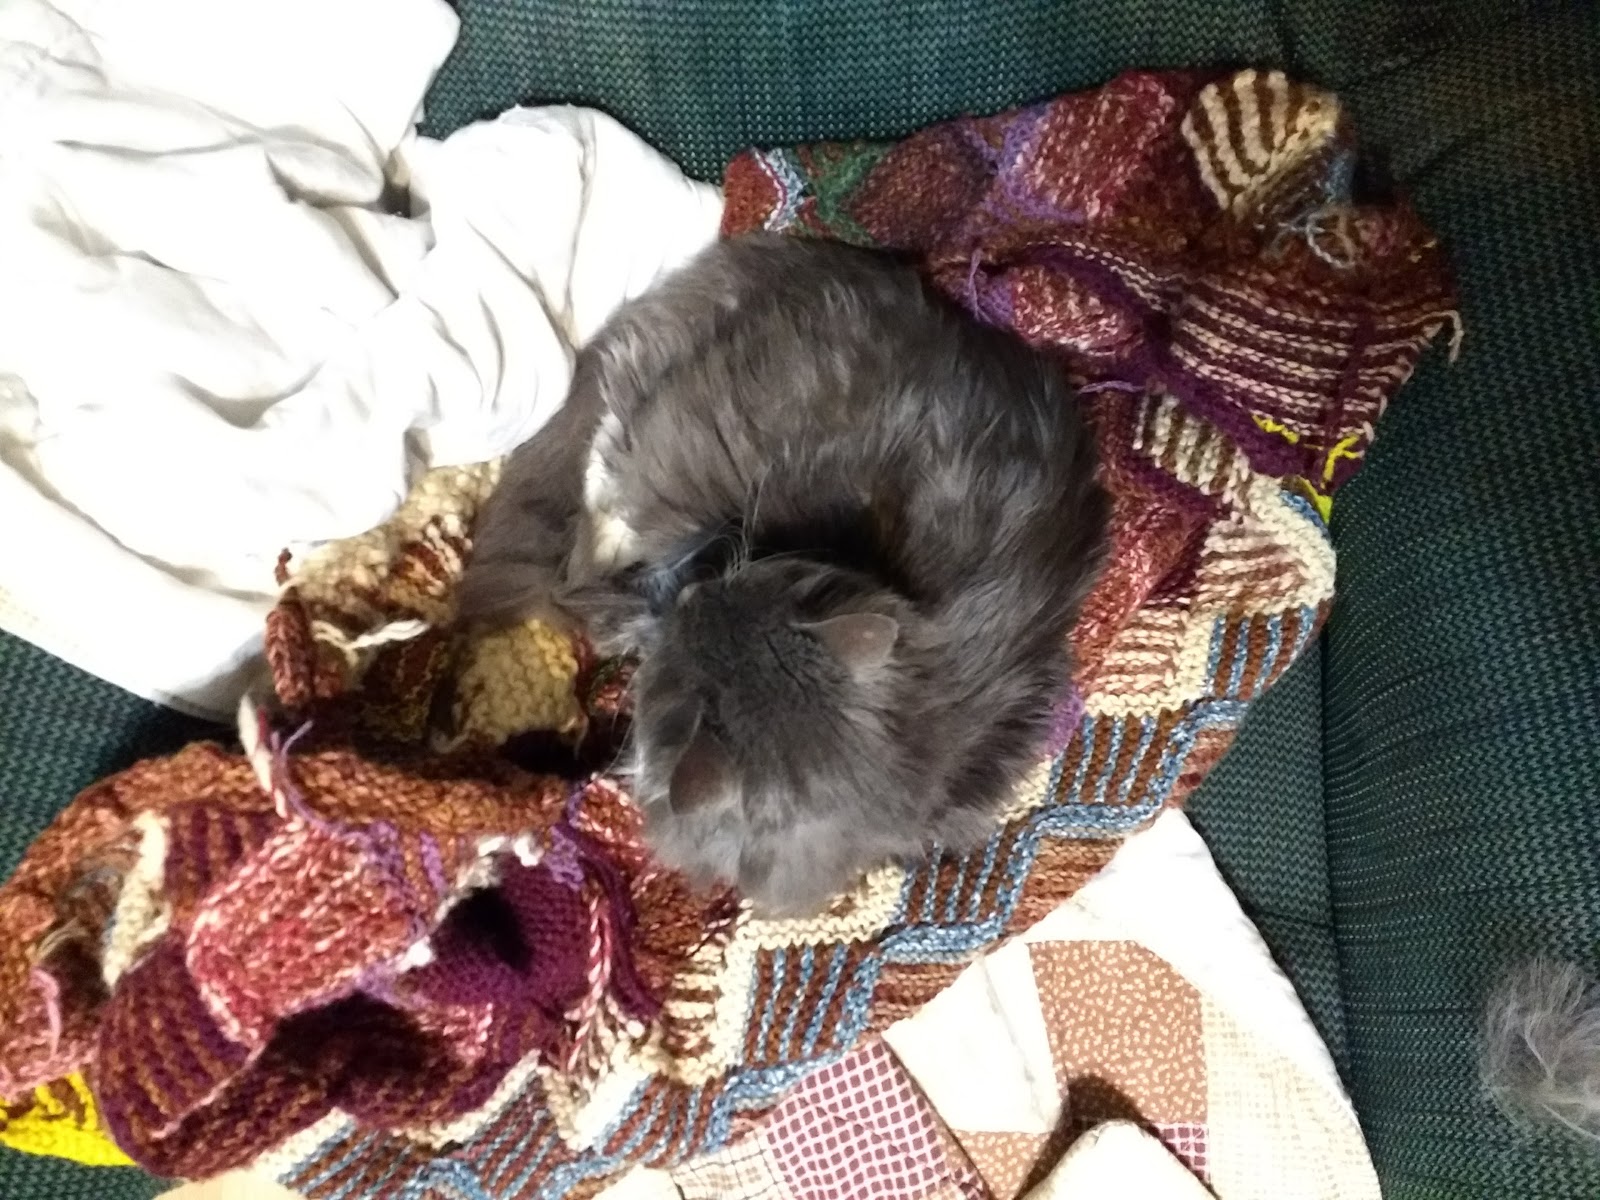
Maia claims all warm and well-trafficked areas as her own, regardless of season. I'm pretty sure this is the only actual photo I have of that house coat. 

Notes so You can Imagine the Shaping

I started with a longtail cast-on, measured to span my shoulders across my back, amounting to 7 squares of 8 stitches each, in super-bulky. I consciously started with the thickest yarn I had - both because I had the smallest amount of yardage in that weight, and because I wanted the structural stability at that load-bearing point. (Seemed reasonable at the time.) I worked the back panel for a decent span, being careful to reserve yarn so the front could match the back.

Cat feets!! And, starting this thing again.

From there, I picked up stitches along the cast-on, and added two 2-square front panels, with a gap for the neckline. I don't remember if I included a bit of stockinette before adding those panels - I remember having a little bit of neckline shaping, but I'm blanking on how that worked.

After an entrelac row or two, I added the other three panels to the front, so the two panels would meet - off-set from front-center because of the odd number of squares.

When all three panels were long enough, I joined the sides to the back panel, leaving arm holes. Then I knitted this many-stitch section as a single panel. It was bulky and awkward, but it went much more quickly since the finagling was over. Well, and not too bulky, since I was all out of the heavier yarns.

After the first few times I wore the coat, I picked up stitches in the arm holes and added shaping to make them a little less drafty. At that point, the only yarn I still had on hand in good quantities was my favorite of my first home-dyeing experiments: a deep raspberry color, in fine-weight plied Merino.

Then, I added front button plackets in the way I'd buttoned up the front of my rainbow shawl, a few years ago.

I don't have photos of that front closure, but look how pretty this shawl is! It uses the shaping and one motif from the Lafitte Shawl from Lost City Knits.

On a Disreputable Sunday in April 2014, I blew off four separate responsibilities and made something fun for my-own-self. Yarn is Hometown USA acrylic, super-bulky (I buy this yarn for Monmouth Caps). 

The new house coat was ham-handed compared to this, of course. But it was functional: it stayed in place, and was less bulky than a shawl or blanket, and kept me from catching cold during my (occasional) sedentary days in winter.  

Conflict:
Using any length of my Raspberry Merino on this project was an uneasy compromise: I wouldn't have to cut short lengths here, unlike in a longtail cast-on that I kept rethinking. But I _did_ have to cut it after the arm hole shaping was "good enough." Gulp. When I added shaping to the arm holes, I never wove in the loose ends, and they snagged and unraveled a smidge. It was never pretty.

In the meanwhile, I brought the house coat to show my Mom over Thanksgiving 2017 weekend - seven of us (three sisters, two* brothers, Mom, a family friend) hunted Black Friday sales at quilt shops. I didn't have anything specific in mind, but I wanted a little piece of fabric to line the neck to make it less itchy. I found a piece of flannel, and put it someplace "safe" in my yarn corner where I've been able to ignore it ever since. *missing a brother for extenuating circumstances

On that shopping excursion, my sister dubbed it the Hair Shirt - "Let me get this straight, you took yarn you hated and made yourself something ugly and uncomfortable to wear all the time." In the immortal words of Peter Faulk: Yes, you're very smart. Shut up.

And then seasons shifted toward spring again, and I wanted to start a new project. I still had a decent length of raspberry Merino available, and my husband was starting to sound envious of my lighter-weight long wool socks, also made with fine-gauge homespun wool. So I started those, despite anticipating that I would need more yarn. But! I didn't want to cannibalize the coat if I wanted to keep it for any length of time. But, why would I keep a coat I was unwilling to photograph? Oy.

Reset:  
I wore the house coat though the end of my winter knitting season. I wasn't willing to lose the warmth before then. But then Gulf Wars was coming. On a day that felt auspicious, I frogged this iteration and documented it as a part of the 100 Days of A&S challenge: Day 39, March 3, 2018.

Maia, guarding the yarn hoard, as is her right and duty.

Round 2: Cardigan. FIGHT!
Early March 2018

Looking at discrete balls of yarn all over again, I started to think in terms of showcasing the individual fibers. I've got some cool stuff here!

I found a cardigan pattern that had ribbing, then entrelac at the base, and then stockinette for actual shaping at the torso. Let's do it!

Pattern Rows and Fibers, starting at bottom hem: 
  • Plain ribbing - white MAC wool, black sheep from a coworker's family farm, Fluffy Goat from Belgutai, raspberry Merino 
  • Entrelac -  modern-dyed mixed-brown, alternating squares with one row of color: green is cheviot; MAC white in a finer ply; blue-pink on the needles is also from the MAC. 
Bottom hem of a new "Cardigan." I started with the same number of stitches as I had in the house coat, but this time constructed from the bottom, up. 
  • Ribbing at waist line - "hotchpot" spinning (re-spins from pencil rovings, roving yarns, first-round spinning projects), red/white MAC wool
Waist line of the "Cardigan," with ribbing inspired by two of the ribbing panels on the Eleanor of Toledo stockings (because I had it in my muscle memory and wanted something prettier than the bottom hem).

Conflict: 
I undermined this project before I even started. It wanted me to make three panels and then sew them together. I thought that sounded like "effort," so I cast-on the number I needed for the bottom hem, and ran with it.

After the waist-line ribbing, I was going to have to figure out where I needed to bind-off stitches to get back in line with the pattern. That would have been easy enough, but I kept putting it off. And then one day, I found (or maybe made up) an excuse, and assertively frogged the poor thing to put it out of its misery - while happily partaking of a Yuengling imported from Mississippi. 

Reset: 
And in this moment, it occurred to me that I've recently "discovered" light shawls. Shawls are so pretty, and they're ubiquitous on the "now what??" recommendations for knitters looking to expand skills past knit/purl design.

My rainbow shawl was a present from me to me. I even have a photo of me wearing it in public! It was my yarn-corner warmth for a few years. But it was bulky and not-subtle. See previous about complicated feelings toward homespun yarn - I'm not getting rid of it, but it's not my end-all. It's fine resting in the blanket storage for a little while. (Like how a parent will rotate toys for little kids - sometimes a project needs to "go away" for some time, and then it can be new and exciting again later.)

I made the rainbow shawl after a disastrous attempt to complete the Lafitte Shawl on lace-weight wool, complete with recommended beading. (Yeah, I picked something with beading and complicated charts as my first lace shawl _and_ first beading project. Fight me.) It was a beautiful mess - it was a clear fail because didn't lay out flat at all. But! It caught and threw light so amazingly. So Texture! Much Wow! I have no idea how I so brutally mangled that darling. Maybe I'll revisit it again someday.

More recently, I have started to consciously carry a lace-weight shawl when I'm not sure what the weather will be, but I anticipate a chill (ie not summertime). I wore it as a scarf at Crown Tourney in January 2018 and Gulf Wars in March 2018 (I have a photo somewhere from Pyro/ Caelin). And lately, it rests near my yarn corner, where it has been grabbed for this exact purpose a few times, now, too.

I don't have a photo of it by itself (yet), but here are its specs: Seth Shawl pattern, lace-weight alpaca from M. Xene (I might still have the tag somewhere - I try to keep them until I record the info somewhere re-findable,but I'm still hit-or-miss about both of those things).

Anyway: So. If I make a shawl/ infinity scarf, I _could_ plausibly use it in real life, based on real-time past behavior. Alright, that's a decent bet.

Round 3: Scarf/ Loop/ Whatever. FIGHT!!1!!

Theory #1: Flat Scarf 
Late March 2018

With the yarn all disintegrated from fabric again, I considered dividing the really heavy yarns from the really light yarns. Maybe make two scarves-?. That thought didn't last very long - I have bulk in the thick yarn, but not much yardage. So, I went up a needle size (5mm to 6mm), and jumped back in. 


Oohhhh, man, that's pretty. Isn't that pretty?!

Conflict: 
So Many Conflicts!!

I figured I'd work the squares in stockinette (and the triangles in garter). But, stockinette by itself is boooring! But, what pattern for the lace? I improvised one design and liked it well enough, but I didn't like it repeated exactly on the next row.

In the meanwhile, I'd started the Nakia shawl, which starts with a Provisional Cast-on. If I did that, I wouldn't have to play "yarn chicken" and risk having leftover yarns. If it came down to it, I could scrounge (or spin) more homespun for the graft if necessary. Great!

And finally, I had a color crisis: I didn't like the red/white in the same square as the brown/maroon. So, that row, i.e. more than 2/3 of the completed fabric here, was already "dead to me." 
Anyway, I didn't like the thought of picking-up stitches from a longtail cast-on pulled that taut. 

Reset: 
I think the width was okay (3 entrelac triangles at base, 24 sts). Maybe use a lighter yarn for the base triangles, so the heavier cast-on isn't overtaxed-? 


Theory #2: Infinity Scarf
Started: Early April 2018
Frogged: Late May 2018

Restarted with a Provisional cast-on. Alternated light-and-heavy strands in the entrelac rows - I did that last round, and liked it. And, from my experience on the blanket, I really liked the effect of changing one color every row to create a gradual color shift across the whole piece.

Ha. EUREKA! The cast-on row (green, acrylic) is over-taut, but that'll get fixed in post (hopefully, I'll have thick enough yarn at that point to do that smoothly).

Double garter entrelac rows alternating with lace (stockinette face) entrelac rows. The triangle rows and ends are all garter, for stability and simplicity. I'm "back burner" considering adding a crochet edge when this is all done, like I did on the blanket.

So far so good! (Famous last words.)

It occurs to me that I really want to map out the colors/fibers I'm using on this round, since I'm finally liking how this is working - and I still do want to track the unique yarns I have going on here. Text colors obvs don't strictly match the colors represented (but I did vaguely try to make it visually track). Rows, starting after the green cast-on, are:

Row 1:
  • White MAC wool (2-ply sport)
  • Home-dyed brown Merino (2-ply worsted)
Row 2:
  • White MAC wool (2-ply sport) 
  • Black sheep (2-ply sport) from a coworker's family farm; the black ran out at the end of the row and was supplemented with brown/pink MAC (4-ply sport)
Row 3:

  • Brown/pink MAC (4-ply sport) 
  • Pink re-spun Bernat (8-ply worsted) roving yarn (mostly wool; some other yarns in red/orange tones)
Row 4:

  • Pink re-spun Bernat (8-ply worsted)
  • White MAC (2-ply bulky/super bulky) 
Row 5:

  • White MAC (2-ply bulky/super bulky) 
  • Home-dyed brown Merino (2-ply worsted) I have a _ton_ of this yarn.
Row 6:
  • Home-dyed brown Merino (2-ply worsted) I have a _ton_ of this yarn.
  • Home-dyed denim-blue Merino, plied with white (8-ply sport) 
Row 7:
  • Home-dyed denim-blue Merino, plied with white Merino (8-ply sport) 
  • Wool of the Andes, "Firecracker" (2-ply super bulky)
Row 8:
  • Wool of the Andes, "Firecracker" (2-ply super bulky)
  • Home-dyed raspberry Merino, plied with home-dyed yellow Merino (8-ply sport)
After another two-ish hours of knitting, it's still panning out the way I need/want it to - yay!

Infinity shawl, covering the yarn I've set-aside for growing it, in the flat-bottom bag I've allotted for corralling all of it. This is the "RS" - the stockinette lacework is facing up. Maybe that'll be more apparent in later squares with better matched yarns. 

Conflict: 
I've been double-wrapping my yarn-overs for the lace squares. Someone with fancy credentials once wrote on a pattern that doing so makes for a bigger lace opening. I have never found that to be actually true - the extra slack does the opposite, in my experience. But, I ran with it for this iteration in case maybe the yarn gauge would make a difference. Yeah, no, you can barely see the lace holes. I'll see if there's a difference in the rows after the yellow/red I'm working on right now.

I've debated frogging this back, to correct that one point, but at the same time: I've already "killt" a few yarns in just this bit of knitting - and in at least three cases, the length that ended managed to do so at a convenient place in the pattern. So, frogging it now would disrespect that yarn's valiant closure. In the meanwhile, I have enough yardage in the finest yarns that I am able to hold plied yarns doubled and quadrupled where it needs to compete with my earlier spinning work with the heavier gauges.

Picking up on Row 7 because I frogged Row 8 after that last photo:

Row 7:
  • Home-dyed denim-blue Merino, plied with white Merino (8-ply sport) 
  • Wool of the Andes, "Firecracker" (2-ply super bulky)
Row 8 - new:
  • Wool of the Andes, "Firecracker" (2-ply super bulky)
  • White MAC wool (2-ply sport)
Row 9:
  • White MAC wool (2-ply sport) 
  • Yellow and Raspberry home-dyed Merino (4-ply fingering)
Row 10:
  • Yellow and Raspberry home-dyed Merino (4-ply fingering)
  • Green Cheviot (4-ply fingering)
Row 11:
  • Green Cheviot (4-ply fingering)
  • Purple/Blue MAC unknown fiber (oily) (4-ply fingering)
Row 12:
  • Purple/Blue MAC unknown fiber (oily) (4-ply fingering)
  • Pink re-spun Bernat (8-ply worsted) (4-ply fingering)
Row 13:
  • Pink re-spun Bernat (8-ply worsted) (4-ply fingering)
  • "Hotchpot" plied - whites and pastel tones respun from short bits (4-ply fingering)
Row 14:
  • "Hotchpot" plied - whites and pastel tones (4-ply fingering)
  • "Hotchpot" plied - dark tones respun from short bits (4-ply fingering)


Thick yarns are bunchy-looking: red and white square is the thickest. Thin squares are stretched all out: pink and purple, and squares on the needles, are the finest. 
And Then!!
I was starting to not be in love with this project. And then:

I found a cute pattern for a bottom-up tank-top, and it's super dorbs. And the lighter weight yarns (purple, red, yellow, green) would all be perfect for that.

And I have enough of my modern-dyed yarn to do something small-ish...

Updates as I come up with the next plan.


Next scheduled update will happen when one of the following is true:
  1. I frog this whole thing again, or 
  2. I get to another serious debate point, or 
  3. I get to another significant milestone in completion, or
  4. It's complete
So Say I: Elsa von Snackenberg. 05-21-2018. 

Friday, April 27, 2018

Project Focus: Eleanor of Toledo Stockings

Stockings, the Italian Way

Attempts at recreating stockings worn by, and buried with (in 1562), a Spanish Habsburg woman who married into the Florentine Medici family. 

This is one of the earliest exemplars of lace knitting and intentional purl-stitch work. 

I'm setting up my notes in two separate blogs:
  • This one is real-time iterations I've created, with project photos. 
  • The other one is research notes, suitable for reworking into classes or documentation on these projects.

Iteration #1 - Muscle Memory
Summer 2013; Yellow, Tonal Wool 
(aka "no idea what I'm doing")


At Laurel's Prize Tourney, Summer 2013, my friend Genevieve told me about some gorgeous YELLOW silk stockings. As a displaying artisan, I was deep into the information overload common to that event, so I didn't write down anything.

When I got home, I remembered "Eleanor" and "yellow stockings." Which led to the following rabbit hole questions (and answers):
  • Eleanor of Toledo vs Eleanor of Aquitaine. Which one knitted? Both, maybe? Maybe neither, and one (or both) had a lovely Court Knitter?
    • Eleanor of Toledo had a silk woman, who, I guess, could functionally be her "court knitter."
    • I don't know about Eleanor of Aquitaine 
    • No idea whether either knitted - EoA maybe; EoT probably not
  • EoT: bright yellow or bright red?
    • most likely, red faded to yellow over time/ grave goo
  • EoA: fascination with diamonds?
    • sure seems to be a common motif in searches for her name
After figuring out the general outline of what I was aiming for, I dug for, and found, a sale on lace-weight wool yarn - the colorway was called "Shadow Tonal" and included a bright-and-shady yellow, and a bright-and-shady red. Perfect!

Side Note: 
This was one of my first experiences (positive as a rule!) with KnitPicks for knitting yarns. Until this point, I purchased from Halcyon Yarn - and still do for all my weaving yarns.

Swatch! 

I usually forego pattern swatching, entirely from laziness. Until this project, I entirely worked projects where the gauge I got was what I was stuck with, regardless of intent. That worked out just fine for a good long time.

But when I started working on this pattern, I immediately recognized that it was out of my league. I wasn't a new knitter, and didn't think I'd be thrown for a loop by knit/purl iterations. But, this is a complicated beastie.

So, I started a swatch with a couple of thoughts: that I would learn enough from that work to make it worth my while, and that this iteration didn't need to be "right." Sure enough: I learned tons, including a few things to not do.


The most significant thing I learned from this swatch was how to do the panel sections under the lace sections. Here they are stacked horizontally - I couldn't figure out why the pattern didn't give me row counts until I did this: I worked them horizontal here, and they wanted to be worked vertically. 


This One Time in Florence, Italy
April 2014

While figuring out the beginning stages of these stockings, including swatching and starting, my friend Lena went to Florence, Italy for a Study Abroad semester-long program.

Through lots of trial and error, and long conversations about practicality and functionality, I ended up travelling alone to visit her and check out the scene.

The two of us puttered around town a bit (Gusto Pizza!!). We'd picked up a few tours (Vespas in the near countryside! Bus to Pisa and Carrera!), and kept ourselves entertained (day trip to Rome!). We never did make it up into the Duomo - it was closed on our first attempt, and as the week wore on, we ran low on stamina and time to burn.

There's an old Mooneschadowe joke about traveling to Europe: There's so much history there, they leave it laying out in the streets to get rained on! (Information overload set in fairly quickly, and my stamina didn't _start_ where I wanted it, oops.)

At one point, we visited the museums at Pitti Palace, the home purchased by Eleonora for her growing Medici family. Lena had tried to play it cool, before I got there, that we were going to see these socks in person - but I'd done my homework, and had an idea of what to expect.

At the ticket counter, in a classic "stupid foreigner" mistake, I'd paid for an extra exhibit that Lena had not, oops. In the arrangement of the museum, it was ahead of the Costume Gallery, so I sped through that exhibit area: 6-8 rooms densely arrayed with French pieces, including a life-size sculpture of Victor Hugo sprawled in an arm chair, reading a book, OMG. She took that time to study for her upcoming exams.

So there I was, in Italy, clutching a bag holding a half sock with definitely-not-right lacework (and questionably incorrect chevrons above), while staring at So Many museum displays, trying to not get completely impatient by my own side-track and the sheer size and artistry and magnificence of EVERYTHING.

And then, payoff.

Toward the end of the Costume Gallery exhibit, I got to stare raptly at the real-live stockings as I attempted to figure out how they differed, and were the same as, the fabric I'd recreated (haphazardly) from the pattern also in my hand.

Airplane tray table from the to-Italy trip, with my first attempt at drafting someone else's version of this pattern (for readability) in the corner. I was a smidge farther along with the knitting by the time we got to the museum. 

Surreal! Also, it felt very "kindergarten" as I gazed at a knitting equivalent of a painting masterwork, and compared it with my "finger painting" version.

I had a pen and a different sock-knitting book with me - that was my only paper and drawing utensil. For being so enthusiastic, and informed, about this trip, I sure didn't plan that part very well.

I drew a sketch, hated it, drew a second more slowly. Started counting rows, and then stitches. Tried to draw more to clarify the point, and ended up with increasingly illegible scribbles. But my notes came out okay, as I counted, re-counted, figured out, and second-guessed.

This is the first thing I am angry at myself for not photographing: I read an intriguing thing on an exhibit board in that room, but did NOT copy or photograph it. I'm leaving this note vague, in spite to both me and you, dear reader: do your best to fight past the information overload, and write down anything worth remembering - verbatim if it's going to be relevant long-term. Because no one would believe me if I _did_ write out what I think I saw on that board, and in the face of that disbelief, I tend to doubt myself, too.

Then, after our museum tours, we caught lunch in the museum restaurant.

This is the second thing I am angry at myself for not photographing: The bottle of water had a label referencing the water-works renovation completed (by Cosimo) in the year-or-two after Eleanor died of malaria.

Exhausted, but still high on that whole experience, I found another intriguing thing: a repeated pattern motif in an unexpected place. And I told myself I'd catch it later. And "later on," I kept pushing the point.

This is the third thing I am angry at myself for not photographing: On a ceramic tile in my hostel, the motif in the lacework in the top cuff of the stockings was echoed as blue lines with red dots.


And then, suddenly, I needed to get out of there to catch my bus and plane. (Sitting in the airport terminal in Germany, alone, for a 5 hour layover, was an excruciating practice of coming to terms with my own bad planning.)

Getting home and back into my head, I tried a desperate maneuver: I'd made friends with Ali, a staff member at the hostel. I emailed him to see if he could sent me a photo of the ceramic tile. He gamely sent me what he thought I was asking. I tried twice, and then decided to not be a nuisance.

Controversies

After I got deep into this topic, the "controversies" I'm still researching are:
  • Sources say "red," but my own eyeballs say "yellow." I don't doubt that the dyes faded over time, but how do we "know" that they started as red?
  • Turn-down cuff "like a little boy," per an Englishman, referring to an interpretation of a photograph included in an Englishwoman's cursory reference to an Italian (or Spanish?) knitted piece.
  • Garters vs grave bindings. This one is pretty clear, but I'll include it while discussing the other tertiary source commentary.  
  • Worked flat - this last is still the most vitriolic debate I've seen on the topic, hence the disclaimer: I've knitted my pattern both ways, both in the round, and flat - both ways work!! I'll show you photos, at some point. In the meanwhile: I'M STILL RESEARCHING! 
I got these stockings done, at some point.


After Florence, I was impatient to start the next pair, and I shortchanged the toe length on these, while starting those. This sock is not comfortable to wear, unfortunately, exclusively because of the short toe. I've kicked around the thought of fixing it, but I haven't yet cared enough.


At one point, I started to think in terms of collaboration. I made a mold of my leg using newspaper and duck tape. I weighted the base of the foot, and it stood upright on its own! This shows the folded-over cuff as posited in one of my sources.


My "foot" cast, covered with the yellow stocking, completed. 

(Ultimately, I got enough grief about my foot being "creepy" that I destroyed it. I can rebuild it, better, if that starts to look like a good idea again.)


Iteration #2 - "Most Best"
Summer 2014; Red Tonal Wool 

I started the red as a "most best" version to compare to the yellow - which, of course, was unfair to the yellow, but I wanted proof of skill improvement over time. So, back to swatching again.


This one still explored a few questions to myself, most notably in the shaping of the ankle "clocks."

I took these stockings to (LPT? in 2016?). One knitter who reviewed my work asked why the panels weren't even - why the stitch count ended on a pattern panel, not an interstitial panel. Great question! It was too late to explore that thought for the red, so I put that on my to-do list for the next pair.

I gave this pair to my friend Sabine. I did that as a placeholder, as described in the next section, but also for me: so I could borrow them back after they'd been worn a little bit, and I could see how the wear lines compared with the extant. The experiment was flawed, of course: as wool, these felted at the feet soles and shoe rub-points. But at the same time, they proved the points I thought they would.


Intermission 
February 2016; Yellow Tonal Wool

For awhile, this was my very most favorite knitting motif.


At some point in here, I started a "hope chest" box, making a bunch of ankle-high socks for myself, both to practice a toe-up cast-on and while daydreaming about longterm plans my husband and I were making.


Iteration #3 - Practice 
November 2014; Silver Silk for Sabine

While working through the red, I started to feel antsy about the street cred of this work. My friend Sabine has a French persona, but she's a costumer, and I thought she'd appreciate Italian stockings - especially these, with such incredible wow-factor and legitimacy. So I talked her into buying silk thread, with the promise that I'd send her "baby pictures" as I made progress on these.

This silk pair were complicated from the beginning - exactly because I wanted them to be perfect, and because I was changing fibers from my more-accustomed wool to silk, which I hadn't much worked with before. I ended up having to work the strand doubled, because 2/30 silk was much too fine for the texture I wanted on size 0 (US) needles.


I slightly changed-up the stitch count of the pattern based on feedback: if these are plausibly knitted flat, it seems like the pattern intervals would start and end on the long vertical panels, not the "static" or horizontal ones.

I averaged an inch in length per hour, with an average of 6 rows to an inch.


And then I ran out of thread. Sabine bought more.

Now I just need to sit still with the red to count out the toe rows to finish these out. It'll be only about 2-3 hours work when I get going, provided I'm not interrupted too severely.

Close-up of calf-shaping decreases in the pattern motif. 


Iteration #4 - Eventing Wool Socks
April 2018; Homespun for Charles

I have now made three pairs of socks for myself, out of wool homespun. And I love them all to pieces.

The first pair is nearly unwearable for being so thick - I want to put a sole on them, and wear them as moccasins. I have suede and rubber cement, and a foot to trace. And I keep not doing that, so I think I'm still cogitating a better plan.

The second pair is my very most favorite ever, made from yarn I re-worked after I had figured out my baseline skill set.

The third is "okay" - the toe is a little thin, which worries me. And I don't love how tight the toe band is, around the color work.

When I started to think about making a fourth pair, I wasn't inspired for my own benefit. But at the same time, I'm pretty solidly convinced that no one else will love my homespun the way I do, so I have to keep it, somehow. And then it occurred to me that my husband lives in my house and would appreciate (and respect) wool socks for the winter eventing season. And I could "borrow" them back, if I developed "gifters remorse." Done and done.

I thought about this in the middle of the Homespun Jacket project, and gathered everything in one place. I'd settled on the Raspberry Merino for this project, and the boyf confirmed that he would accept that color in his life. I started to work toe-up, and couldn't figure out why it kept fighting me. So I left everything in a bag, and put it in time-out.

Fast forward a bit: When I, ha, did my due diligence and pulled out the pattern, oy, it turned out the pattern was cuff-down. Glad I'm doing this now, ahead of the next project iteration.

Then, I agonized over starting the swatch. I brought the bag, pattern, needles, etc with me to Wiesenfeuer Baronial. When we got word that the event was cancelled for rain, we turned around and I turned on "full speed" mode to finally get this thing started.

Raspberry Merino. It really just looks the best in day-lighting. 

And then, I had to figure out counts and stretch, and fit. Oy. That was another two iterations. Finally, I dropped the number of stitches to a point I'm not willing to go beyond. And now we're game-on.

Cast-on Sock #1 for Charles. 
I complain, but I do want these to 1) be wearable by the intended party, and 2) look nice when they show up, in for-real daylight, at some event possibly near you (and likely near me).

And here we are, at the very tippy-end of the cold season.

But shout it at them in german, because...
LINK: https://goo.gl/images/WNMp7Q

Functionally:
I'm making thick wool socks for the boyf because I love him and want to him to be happy;
To be completed in the summertime, because love can be stifling and inconvenient.


Iteration #5 - Commission
August 2016; Silk for Tatiana

On August 1, 2016, a friend posted a silent auction to benefit an acquaintance starting a fight against cancer. I knew all the parties involved, and wanted to help.

I checked with the coordinator: I was pressed for time, but still was willing to offer two pairs of stockings, timing to be determined. She said that sounded reasonable - both sock offers were fancy enough that the winning party would likely expect a decent construction time lag.

Sure enough: the bidding went respectably high, and then the winning party and I waited for our lives to line-up. She wanted to use a fiber I didn't have on hand, so we discussed options. And then more life. Conveniently, the longer we waited, the more brain-processing space I have been able to free up.

[will update - as of April 2018, looks like our timing is about to line-up]


Rabbit Holes
Because, I can't bring myself to delete a link for a "Sock Museum." Disclaimer: Links may be dead. I haven't checked these since I initially placed them. 

Sock Museum! How could you not?!
http://www.sockmuseum.com/socks/eleanora-toledo-socks

Ravelry link with a pattern!! In Carnation Pink! June 2008
http://www.ravelry.com/patterns/library/eleonora-di-toledo-stockings

This has lots of links to finished works: PDFs of class hand-outs and other works of AWESOME!
https://sites.google.com/site/grenewode/

How-To work-through of the Ravelry pattern! With the chart that comes up the most commonly during such searches.
http://georgresearch.blogspot.com/2007/11/eleanor-of-toledo-socks.html

Another version of this stocking, with photos of the extant stockings and new work based off a TI article:
http://www.mktag.org/projects/caelfindToledoStocking/content.html

Tournaments Illuminated article references:
Knitting Eleanora of Toledo’s Stockings, by Melinda Strehl. Tournaments Illuminated 1998.
Revised Pattern For Eleanora Of Toledo’s Silk Stockings (26/5/00)

Gorgeous slouchy YELLOW sock with folded cuff and red scarf tied like a garter. It's not a top return, but it's in there (second row on 9-17-2013). This is the link, but it gave me a 404. I haven't chased it further yet (but the root also comes back dead).
http://www.aneafiles.webs.com/renaissancegallery/italian.html

Sunday, January 5, 2014

Cold Afternoon Slippers


All through the Winter Solstice 2013 (when I watched vigil on the longest night), all through Christmas break and all the preceding for-Christmas knitting marathons - I've wanted to make slippers against my cold wood floors. Just finally got around to it yesterday, after spending a few hours reading other designers' patterns. Here's what I came up with after some trial and error.

Cold Afternoon Slippers

Yarn: Bernat Roving.

I used the multicolored vareigated, held double (center pull strand and outside-wrap strand), as recommended by Knitting Daily. One skein per slipper.

Update: Unfortunately, that yarn isn't what it used to be. For reference: I used an all-wool pencil roving yarn, worsted weight.

Needles: Size 11 circulars, 16" cable.

Even this short cable is a smidge too long for the round, but Magic Loop is your friend. Link: http://www.knittingdaily.com/blogs/daily/archive/2009/09/16/the-magical-magic-loop.aspx

This is going to be a little tricky: my increases for this pattern split the two strands that are otherwise held together to work them independently (with doubled strand). I'm calling this both "knit through individual" and "knit half." Hope this makes sense, and please PM me if I lost you.

Directions
Using the Magic Circle (aka Disappearing Loop) cast-on, CO 4 (w/ doubled).

It's not super complicated - the gist is: make a loop, and wrap stitches around that loop. When you've knitted a round or two, pull the tail, and that first loop will disappear into nothing. Here's a tutorial: http://techknitting.blogspot.com/2007/02/casting-on-from-middle-disappearing.html 

Round 1: k through each individual strand (increase to 8 sts)
Round 2: k 1 (through both), k half/k half* 12 sts. PM at beginning of round.
Round 3: k1, k half/k half* 18 sts
Round 4: k1, k half/k half* 27 sts

Foot body:
PM after 13 sts. Work the sts at the beginning of the round TBL so they twist - this will increase the durability of the sole.

K even until the tube is long enough to reach the instep. Mine's about 24 rounds. 
Place non-twisted sts on holder. 

Heel:
Working in Stockinette (smooth face, k on rs and p on ws), alternate between the following pairs of rounds until the heel cup reaches the back of the heel.
k to last 3, ssk, k      \
p to last 3, p2tog, p  /

s1, k all  \
s1, p all  /

Gusset:
Pick up sts on each side of the heel - should be 3-4 - and also put the live instep sts on the cables. 

Work as follows: 
Work ONE pick-up st, then turn.
Slip the new st, turn and work. Repeat this order (s1, work even, work 1 pick-up, turn) until all pick-ups are worked. 
Work half the live instep sts, turn. Work through the other half. 
By now, you'll be running very low on yarn. Keep working this way (s1, work even) until all yarn is gone. Mine ended at slightly different places.  

Put live sts on decorative non-felting (acrylic is good here) yarn, cut long enough for drawstring tie and a knot(s) to secure it in place. I like Hometown USA for this purpose: It's thick, brightly colored, and plentiful in my yarn stash.