Showing posts with label in progress. Show all posts

Thursday, August 20, 2026

Now for Something Completely Different - Professional Portfolio

I am well overdue to create a professional portfolio for my skills in editing, technical writing, and project management. This seems like a reasonable place to sandbox this new focus, from the perspective of using what I have and know before quantifying what I may prefer or need.

First things first: 

LinkedIn Profile

I have worked on a number of published projects - I show up in a web-search associated with at least most of the titles.

After that: 

here is an outline of what I need to build in this space, hopefully in the near future - I have a video queued up to help me sort this out. In the meanwhile, off the top of my head, I'll need to show: 

  • Editing skills
    • Formatting, spelling, sentence structure 
    • Reading for flow, comprehension, 
    • Recognizing what is NOT there that should be 
  • Word-based editing mark-up skills
    • Track changes
    • Margin comments 
    • In-text comments
  • Writing skills based on prompts
    • Appropriately formatted text on a given topic 
    • Indication of uncertainty where I may need clarification 
  • Project Management including Communication to Stakeholders
    • Project style sheet - what assumptions am I making? What style/formatting/voice parameters are in place? 
    • Asking for clarification where I am not familiar with a concept/treatment
    • Agreed-on work parameters, tracking needs/resources/check-ins
    • Expected due dates for benchmarks including sample edits, developmental edits, etc 
My point in this space is to show my capabilities and set reasonable expectations. 

Friday, June 25, 2021

2021 Tour de Fleece

Here we go again! 

https://sports.nbcsports.com/2021/06/23/2021-tour-de-france-live-stream-schedule-dates-route-how-to-watch-and-more/

In case anyone was wondering what my "spin" looks like, here's an archive photo of me and my bestie-cat doing yarn things together, circa 2013-ish: 

Maia with yarn for Monmouth caps. She prefers if I just stop moving and let her sleep on me.


I looked up past notes, the other day, and discovered that I've been following the TdF (whichever way you read that acronym ;) ) since 2014! 

Pre-Tour Inventory: Work  

At work, my stash is currently all Jacob wool, after a Woolery quiz paired me with this fiber in a "What Sheep Are You?" kind of sales gimmick. I was so happy with the result, I bought a top of each of the 4 natural colors they had (white, grey, black, stripey grey/black), and I'm working through them. That's a good "production" spin, but not inspiring for a limited time challenge like TdF, so I dug through my at-work stash and found samplers - so now I'm starting with Norwegian Top.


Sampler fibers! I'll post the citation if/when I dig it up.


Pre-Tour Inventory: Home 

At home, my spindles are full with white Jacob and cat (both of mine are long-hairs: dark grey tuxedo, beige-Himalayan). I started clearing my spindles at an Adlersruhe demo, and got into plying with two of the sheep spindles, leaving half of a third. 

Over lunch, I dug in my hope chest for roving to work with. (They're all in there, after the Great Rearrange, a few years ago, in which all yarns moved to one side of the living room, and rovings to the other. <3) 

-- I initially thought about the Merino I blended from primary colors into a nice Mooneschadowe maroon. I've been waiting on that until I knew what that wanted to be, but it wouldn't hurt to spin it and maybe leave it as singles - I might-could even BLOCK it as singles! I haven't done that step before. 

But in the process of digging, I found the full Eider Top - I think that'll be where I start for home spinning. I bought this one at the same time as the Jacob, in 2019, to be another New Experience (separate from the sample above, which duplication was not intentional [and sources are different, so there'll still be some differences in the fiber itself]). 

1) Samplers


Fiber in its sampler baggie.
All fiber from the sampler baggie on a spindle.

Norwegian Top was hair-like for a bit, and then we got to be good enough friends. I don't know that I love this enough to make it my primary - but also, I still don't really have a primary. For all that I committed HARD to the Jacob, for a bit, I don't know that I'm going to setup recurring shipments, or anything. 

First eighth on a spindle, with the second started.

Welsh Mountain Top is spinning like an obsession - I have a hard time putting this down. 


2) Home Stash 

Eider Top is spinning like a dream - it just runs, and I go immediately into a Zen state. 

3) New Orders

So there I was, minding my own business on the Tour de Fleece FB group, and someone posted a spindle full of rainbow, and I had an "inappropriate lust" moment - the colors were sublime and the layout of the copp was artful. I searched for rainbow rovings first, and picked up two in breeds I don't think I've spun to date. And then I read the post, and the supplier had a FB group for his work. So, I'm in for two there, too! Updates as I have things in hand, which should start later tonight. 

Leicester Longwool Locks


Cotswald Locks


4) Finished Hanks

I hanked off my white Jacob - what I'd started plying at Adersruhe. I have it labeled for this year's TdF - I might add my chart here, as I get it more populated. 


Wednesday, July 11, 2018

Project Focus: Spinning a Targhee Roving

[Work in progress, updating on Wednesdays until all spinning/ plying/ hanking is completed. Maybe ending with knit swatches.]

Material and Source Notes


Vendor: Hummingbird Moon
Location: Boulder, Colorado

Fiber: 100% USA Superwash Targhee Wool
Processing: Cleaned, dyed (modern), combed
Weight: 4 oz

Colorway: Bubbling Brew
Care: Will Not Felt. Wash cool water, air dry.

Cute tag!
I bought this wool for the color, and for the change in scenery from working with raw wool. Before buying this roving, I knew that I don't entirely love Targhee (I'm pretty spoiled on Merino and Corriedale these days). But I also think it's important to keep up skillsets.

So! Working with something new! I'm pretty happy here.

In the box, all stretched out and draped back in. It's got a nice tie-dye effect.


Surveying the Materials

In the interest of being as photograph-friendly as possible, I'm going to be a bit formal with this project. I'll try to note where I usually deviate from what I'll do this time.

Rovings usually store/ship in a dense daisy-chain because this treatment minimizes tangling and makes it easy to attach a tag.

Chained like this, you can still see the colors of the whole - which is good for identification in storage. 

To start this project, I unchained the roving and laid it flat, to show what I'm working with in terms of color and length.

 I initially laid this out doubled like this for the sake of getting it all into one shot. Conveniently, this also shows the colors lined up.
I'm seeing a few things in this photo:
  • Dead center has the most white on all four "strands." 
  • The left end (two ends, one fold) is in shadow, but also it doesn't have much white. 
  • Right end (two folds) also doesn't have much white.
  • (roughly) 160 inches total = 13 1/3 feet = 4 4/9 yards (yeah, I looked up that fraction)
After thinking about it a little bit, I also took a photo of how the roving was probably arranged (give or take) while dyeing. This looks plausible to me - it explains the dense white spot, and the rest of the color streaks line up just so nicely. 

If you're having trouble seeing what I'm seeing, look at the bright pink dye line in the middle of the photo. Imagine that I got it lined-up straight, and you should see the other colors also line up. 
All the pretty yarn this will make! Let's get to it!

Preparing the Roving

It's not strictly difficult to spin directly from a thick roving like this, but the work is considerably easier (and less frustrating, and more color-consistent over the length of the yarn) with some quick prep. 

Disclaimer: There are whole tutorials and opinion pieces on roving prep and handling at KnitPicks (and elsewhere). I'm less trying to teach a how-to and more showing off a fun thing I like to do.

In my usual practice, I tend to not be terribly concerned about range of colors over the length of spinning - I'm a "journey" (not "destination") kind of spinner. For the sake of this exact iteration, I want to have the prettiest outcome, and I think working this way will do that. 

Prepping to Preserve the Color

For the sake of showing best practices, I'll start with an actual stated goal: I want all resulting yarn hanks to end up looking about the same as each other. 

How do we do that?

Did you see how the color shifts over the four lengths? I think it'll be sanest to start by breaking the roving at the three fold points, giving me 4 separate lengths that all (roughly) match for colorwork. 

On this roving, the loose ends and three fold points all have this teal in common. 
We should probably take a minute to talk about staple (hair) length. Many processed wool rovings have a staple about 5 inches long. (Rovings/ sheep breeds/ fiber processing all vary. Maybe I'll get into this in the actual spinning section.) 

What that means to you is, you need to hold your hands further than that distance, for the fibers to slide across each other (ideal) instead of snapping and breaking while you work (not the best). For this exact step, it's enough to grab at the outside ends of the color section that I want (teal), and pull gently along the length of the roving. The roving stretches and then pops apart. 

Now I have four sections of thick roving. An easy way to manage that bulk is to split them down the middle.

But before we get to that step: 

I highly recommend working with one section at a time. The more you handle roving, the more likely it is to felt, mat, stain, shred, or otherwise look unhappy. I put three sections back in the box it came in, and left one out. 

I also recommend working out of a bag for the bits of roving that are next in the queue but not currently attached to the spindle (or wheel, if that's what you're into). Paper or plastic bags are good (I prefer a gallon zipper baggie for reusability and visibility; this time I'm using a little paper bag from Panera). Fabric bags may snag and fuzz up the roving, but that's less a problem than the roving blowing in the wind.

At each split, I keep its twin in easy grabbing range so it's next in line. 

Splitting the Roving

The quickest, easiest option, that preserves the color schema from dyeing, is to split the roving.

This step is exactly as mystical and complicated as parting hairs all lined up straight after being combed. 

Spread out the roving so it forms a flat-ish, thin-ish sheet. It will usually show a little bit of a thin spot in a place or three. Grab roughly half in each hand, and gently pull down the length of the roving. Voila! Two rovings!

Yeah, that's not quite the half-way mark, but it is a natural line. Good enough!

Do that one more time. I prefer to stop here: each piece is fairly thin but still substantial. 

Quarters: Roughly halfsies, twice. I did better than usual this time!

Also, I don't always get the "about half" ratio quite right, leaving one really thin bit and another pretty thick. The thinner lengths will spin more quickly, and more true to the ratios of the original. Your call about how far you want to go with this, but I recommend stopping at 1/8s before you have much experience. After then, you'll know what works for you.  

DISCLAIMER: This is not intended to be a "learn how to spin" post. I think Abby Franquemont's presence on YouTube (and in her books) is quite better than I can manage any time soon. But, I'll show all the steps, minus the actual-spinning parts, since they're hard to photograph in the moment. Maybe eventually I'll get a camera I can operate by blinking - that's a thing, these days, right?


Fiber Management

Long, wispy fibers want to get caught up in your spinning. My best way of handling that is to wrap it around the base of my thumb - loose enough to slide off my hand later, tight enough to stay in place. This serves the function of a distaff, but I don't have the skill set to use that tool, yet.

"Batt management" - where batt is a similar treatment for processed wool (resulting in sheets instead of long ropes, to oversimplify). 

Length Quarter 1
Spinning!

In "stuff happens" news: the spinning drew from half of the roving and left the other half behind. There's ways to work that back in, but for the sake of simplicity: Let it Go! Split it!

Eighths. I guessed it might do this when I started getting blue-then-pink in the spinning before I ran all the way through the teal. 

Look at the pretty colors!! I don't know if you can see it from your monitor, but some strands feature two contrasting shades twining on each other, giving a speckled kind of effect on the strand. That'll be more obvious during the plying stage, where we put multiple strands next to each other.

I love this part of the spinning - watching each new color effect show up, while having an idea of what the overall effect will be.

From left - teal to blue to purple to pink. Each of the colors blends on the next. 

I'm half-heartedly trying to keep the colors separated on the spindle as they accrue - it's kinda tricky with the overlaps. This is what it looks like after that first bit: divided half, then half, then half (1/8th) of the total thickness, and 1/4 of the total length.


First bit of roving: 1/8 by width, 1/4 by length. The white at the far right has some length of clear, solid white, but is mostly shot through with light and dark blues. 

I'll definitely aim for one or more photo per quarter roving (by length). I've found practice drills (whether focusing on quality or length) to be helpful every once in awhile. I'll try to get photos and charts of those, in the process. I usually spin about half a roving at a time on a spindle. More than that often gets unwieldy and somewhat less efficient to ply later.


Color Notes 

Tones I'm seeing in the middle white sections as I go, numbered by sequential bit-of-roving:
  1. White shot through with light and dark blues 
  2. Dark blue shot through with white 
  3. White shot through with pink 
  4. White shot through with pale pinks and blues 
  5. Unicorn-like twists of white, pink, and light blue  
  6. Primarily white with lacings of blue and pink  
  7. Primarily white with hints of pink, then striped with purple at the end  
  8. White shot through with purple
  9. White and purple, evenly
  10. Primarily white with sections of blue or purple 

I was expecting more of these to be 1/16s, but no matter. It's still pretty cool to notice that no two identical in terms of the color composition!
Length #5, trying to keep the colors separate as I work them. Far right, teal, was the beginning of this piece. I'm just getting to the white part now, at the left/ whorl. The actual-green is stronger on this one than I've seen on most others so far.

After about the third length, I noticed one end has some orange-ish coloring close to the ending teal section - you can see it a little bit in the above photo. The other end of these roving lengths doesn't have that orange. I'm not sure if that's a reaction between the pink and green, or what else might account for the atypical color. But! It's convenient for making sure that I'm getting each new bit oriented in the same direction as the preceding sections.

Length #10. Note how much room on the spindle is taken up. I didn't separate the color shifts this time.

The colors are kinda muddy, now, and I don't like that as well as having them separated out a little more clearly. Good to know! I don't usually pay attention to such things, but it's been worthwhile to see it now.

Moving on!

Length Quarter 2

Today, my spindle feels very heavy, and that's a little cagey-making. So, I'm going to shift gears from here. This is not necessarily ideal, because I got a little bit into the second quarter before making this plan. But, whatevs.

On the spindle is all of the first quarter, plus a bit of the second. The coils and unspun roving attached to the spindle are what's left of the second quarter. 

So, the next step will be unwinding the spindle and concurrently collecting the yarn (hopefully strategically, to prevent tangles/breaks). Then, plying. Then it'll be for-real yarn!


Winding and Plying

I usually do this in a low-tech kind of way. I have a box with holes punched in it for a Lazy Kate.

First round: winding a center-pull ball from the spindle. The teal bit hanging off the ball (on the real fur backdrop) is folded over on itself to minimize un-spinning.

  1. Ball the singles in-hand. 
  2. Then, re-wind the ball, holding the inside and outside strands together. Do this as many times as you want strands in the ply - one time is two strands, two times is 4 strands. For this project, I wanted 4 strands. 
  3. Then, add twist by attaching the yarn back to the spindle and letting it run in the opposite direction from initial spinning. 

Two plies in the new little ball. In this step, be careful to hold the two strands parallel at even tension. Loose bits will twist on themselves and may knot up. 

I wanted this yarn to be 4-ply because it spun-up very fine and it won't felt, so I anticipate that it will not have much inherent durability. And, 4-ply will even out the yarn color and texture.

The color of the spun yarn is much more uniform than the unspun roving both because of the four plies concentrating the tones and also from splitting the roving, instead of working it as dyed.  

What am I Going to Do with That Yarn? 

When spinning starts, so do the questions. The most frequent questions I field are (in no particular order in real life, but in order by answers here):
  • What are you going to do with that yarn?
  • How long does that take you? 
  • How much yarn do you get from spinning?
All of these questions can be intensely frustrating if I'm not ready for them, for a number of reasons. When they are stated in clear terms, the answers can still be severely variable. When they are not stated in clear terms, the questions often come across as "why would anyone waste their time when you can buy socks for $1 at Walmart?" Oy.

Rant: I appreciate that it's meant well - not everyone has a robust post-apocalyptic skill set. And, if you don't, you probably don't know how very ZEN it can be, to channel violent emotions into materials that yield pretty colors and intriguing textures and fabrics that serve an un-arbitrary function, bent to one's own will, should you have the skill... /ahem.

But if I'm ready, there are commonalities. And, if I get my game plan in place well enough in advance, I can even phrase my answers as, ah!, spinning a yarn (though, unfortunately, my story telling skills are clunky at best).

So, I recommend: Immediately when spinning starts, it's time to start thinking about what this fiber wants to be when it "grows up."

A lot of times, the fiber will talk to you, in any of a dozen ways. And, early work can influence end usefulness. If the yarn isn't forthright about communicating, some "cheats" apply, and yield perfectly functional end-product yarns.

Almost without exception, if I don't have a plan for a roving, I ply it (two strands), and put it in a cedar box until either the yarn speaks to me, or the box gets so full that I start forcing the issue. (The latter has never worked well for me.)

For this exact project: 

This yarn is wool and therefore warm. It's spinning fine (as in very thin, and will produce lots of yardage), and therefore will also eat yardage (require lots) - so the project should be fairly small just to prevent heartache. And it won't felt, so it needs to be fairly light-wearing - ie probably not house slippers.

I'm thinking wrist-warmers, especially plying the thread to four strands for durability and a little more bulk. Wrist warmers don't take much yardage. Depending on the finished length, you might be able to get two sets out of a roving. Anyway, it's never too early for a knitter to start hoarding warm things for the winter holidays!


How Long Does That Take You? 

I'll show my work in this section, starting with the quantifiables.

This is all that's left of the second quarter. Bottom is two halves that equal the top (give or take). I'll start with the bottom right piece.  
Pulled out the one piece, put everything else away. Set up a stopwatch. Then got going. I drafted too fast once, and the thread drifted and broke.

First piece: 28 minutes 2 seconds 58 milliseconds

Do this again for the other three, to see how the commonalities fall.

The notes throughout this section apply to each of the rounds: yarn breaks, I get distracted, I forget to set the timer until I've already gotten past the first teal section.
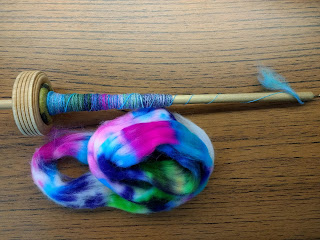

Second piece: 25m 44s 69 ms

But also, loose roving becomes yarn, it's wound onto the spindle, and muscle memory resets all the variables and we go again. I'm getting decent at spinning by feel, whenever I stop to think to do so.

Third piece: 35m 39s 56 ms

And I've been more careful than usual to watch as I load the spindle, to keep the colors like-with-like - it's just nice for the photos, especially
considering that I bought this roving exactly for its colors.

Fourth piece: 37m 48s 20 ms

We'll meet again. Don't know where, don't know when...

Length Quarter 3

How much yarn do you get from spinning?

I split this quarter into 8ths, and thought I'd be clever and show the color differences working this way as opposed to 16ths.

I predrafted the first section of 8ths, to about the same thickness as a 1/16th. This is important to keep the colors together while spinning, as shown in the first Quarter 1 photo. I'm hoping that working with 8ths will give more variability in the color of the overall plied yarn.


Takeaways

It would be overstating things to say that I'm good at spreadsheets. I'd maybe phrase that as: I'm a spreadsheet junkie, always looking for another cheap fix. So, I've compiled the data from this project into a table for easier reference. I might try to time the 4th quarter for comparison, since the 2nd was shorter in length.

Quarters1234
Spinning Minutes127.48
Total Feet
Total Yards

Feet are measured by wrapping a niddy noddy with a foot-long shaft.

Yards are calculated by dividing the total number of feet by 3.


Knitting

This is one of the primary pay-offs of the work of spinning: being able to handle yarn that I have a personal attachment to, and watching it reach its potential. So gratifying.

In writing out my notes for the end of the second quarter, it occurred to me that I'm setting myself up very nicely for wrist warmers - yay for me! I have a pattern that I developed my-own-self a year or three ago, and in spinning, plying, and hanking the yarns in quarters (ignoring the first awkward dividing line), I conveniently have four equal-ish sets of yarn - each can become one wrist warmer, equalling four total, two pairs. Convenient!

I've been writing out my pattern, and I'll post that live with the final update. I'm in the process of taking photos of an in-progress set, now, and I'll re-do that work for this yarn, too.  

Monday, May 21, 2018

Project Focus: Homespun Knock-Down

This One Time, at Spin Camp

To jump to the punch line: I've been spinning yarn (drop spindle; wool, silk, cat hair) in drips and drabs for a few years now, and have accumulated decent yardage of 2-ply yarns. Some bits of yarn have gone on to permanent existence in weaving projects, and some are waiting patiently for me to get around to their One Thing.

Other bits of yarn were just novelty purchases that never told me what they wanted to be when they grew up. It was fine when spinning was my focus in its own right - I had an overall yardage goal based on weaving, and anyway, hoarding "fresh" yarn is pretty rad! But then I started having other ideas for my time, and now I need to find space for the next round of projects.

I'm stuck in this corner:
If I talk about how I don't particularly love this yarn that I spun, I get lots of offers to take it from me. I've been that person, and I don't trust past-me to actually use the yarn in a way that current-me would appreciate.

And: I know for-sure that not-me-at-all will not appreciate my homespun yarn the way current-me does, warts and all. For example, at one point, I seriously got teary-eyed over this yarn's potential, like it was a kid growing up. Ludicrous, but it's my ludicrous. Call it "personal investment."

When yarns have been clear with me about what they want to be, the whole work is a joy, even when we disagree about a particular nuance of technique.

In the meanwhile, this yarn didn't know its own mind. When I started pushing the issue, it pushed back. "Bad as a kid," as my mom would say about any little thing (including the cats) pitching a fit about not getting its own way - especially when it doesn't want to clarify what it DOES want. Oy.

This yarn collection spans traditional gauges from superfine lace to super bulky, and I want it ALL to leave yarn storage and move into fabric storage. My summer "spring cleaning" plans this year include reimagining my living room blanket storage. I want more blankets/shawls for my living room - it's drafty in the fall/winter/spring ie knitting season, and if I can find them reliably, I can also grab them for events, etc.

In the meanwhile, I started being more consistent in taking photos of my projects on January 14, 2018, as part of an arts and sciences challenge you're welcome to join, with no commitment: 100 Days of A&S - take/post photos of your arts/sciences every day. It's surprisingly difficult!

One of the complications in finding 100 things to photograph over as many (or maybe more) days is making visible progress in anything. That's especially tricky when I keep ripping things apart! Midway through this exact project, my sister mentioned that she liked seeing all the iterations - my tenacity in trying to get it "right" and the variations I've explored. And it occurred to me that I have a blog already set-up that I could use to collect those thoughts. So. Here we are.

Round 1: House Coat. FIGHT!

Theory #1: Looong Jacket
2016 - January 2017

"This one time," I surveyed my holdings and discovered plenteous yarns I loved, but that were without purpose. And I wanted them to reach their full potential.

Or maybe more truthfully, I wanted more space to buy or make yarn a la the model: Use it Up, Wear it Out, Make Do, or Do Without.

I routinely disallow myself to buy yarn when I've got a backlog I don't know how to use. A few years prior, I used momentum from a similar review to purge all the "weird" yarn from my house. I ended up evicting 10 full tall kitchen trash bags. Yeah, not kidding.

Mission:Use Up the Yarn. Challenge Accepted!

I considered making a huge drapey coat, in garterlac. That would use up lots of yarn in a way that was functional and so pretty. I started, using only what I knew in my head. I had a nice entrelac pattern from my sister: Criminy Jicket's Garterlac Dishcloth. And I've successfully knitted a sweater (I like the shaping quite a bit, but I don't love how I did the color-work, so I rarely wear it). And I do some clothing-sewing, so I understand how garments come together (in theory).

But, the more I worked on this stash-busting project, the more we fought, the yarn and I. First, it made me decide whether I wanted to use my homespun yarn, or if I wanted a more uniform texture. Grudgingly, I settled on using store-bought yarn. Even then, it didn't want to conform to my expectations of being a jacket - it wanted to be a flat blanket, possibly for taking a luxurious nap on the couch. And then it wanted to have opinions about every color change. It did let me talk it into accepting one white strand of acrylic with a silver metallic thread spun in. Self-contained, non-shedding glitter.

Look how pretty that is!! It's long and narrow and squishy - oh yes, and drapey. And it used up a significant pile of yarns. We get along so well, since January 2017 - now that it's all done and functional and unique, and even visually striking.

Garterlac blanket, mostly using Hobby Lobby's "I Love this Wool," from back when that yarn was actually 100% wool. 

And then it was summertime in Oklahoma, when it's too hot to live, and when it's really hard to imagine wanting to touch things that make you feel WARM. It's not unheard-of for temperatures to reach 110 degrees Fahrenheit in high summer. Ew.

And then fall again: the crisp bite in the air that says that textiles could be lovely and decadent - even the wool ones.

Theory #2: COAT!!!1!1!
Fall 2017

This time, when I evaluated my remaining use-up yarn, most of the collection was yarn I'd spun. And I still wanted a jacket-type something that would hold itself in place regardless if I hopped up to switch laundry, or whatevs. And I thought I'd learned lessons from the blanket, on how my next try could be a coat. And I ran with it.


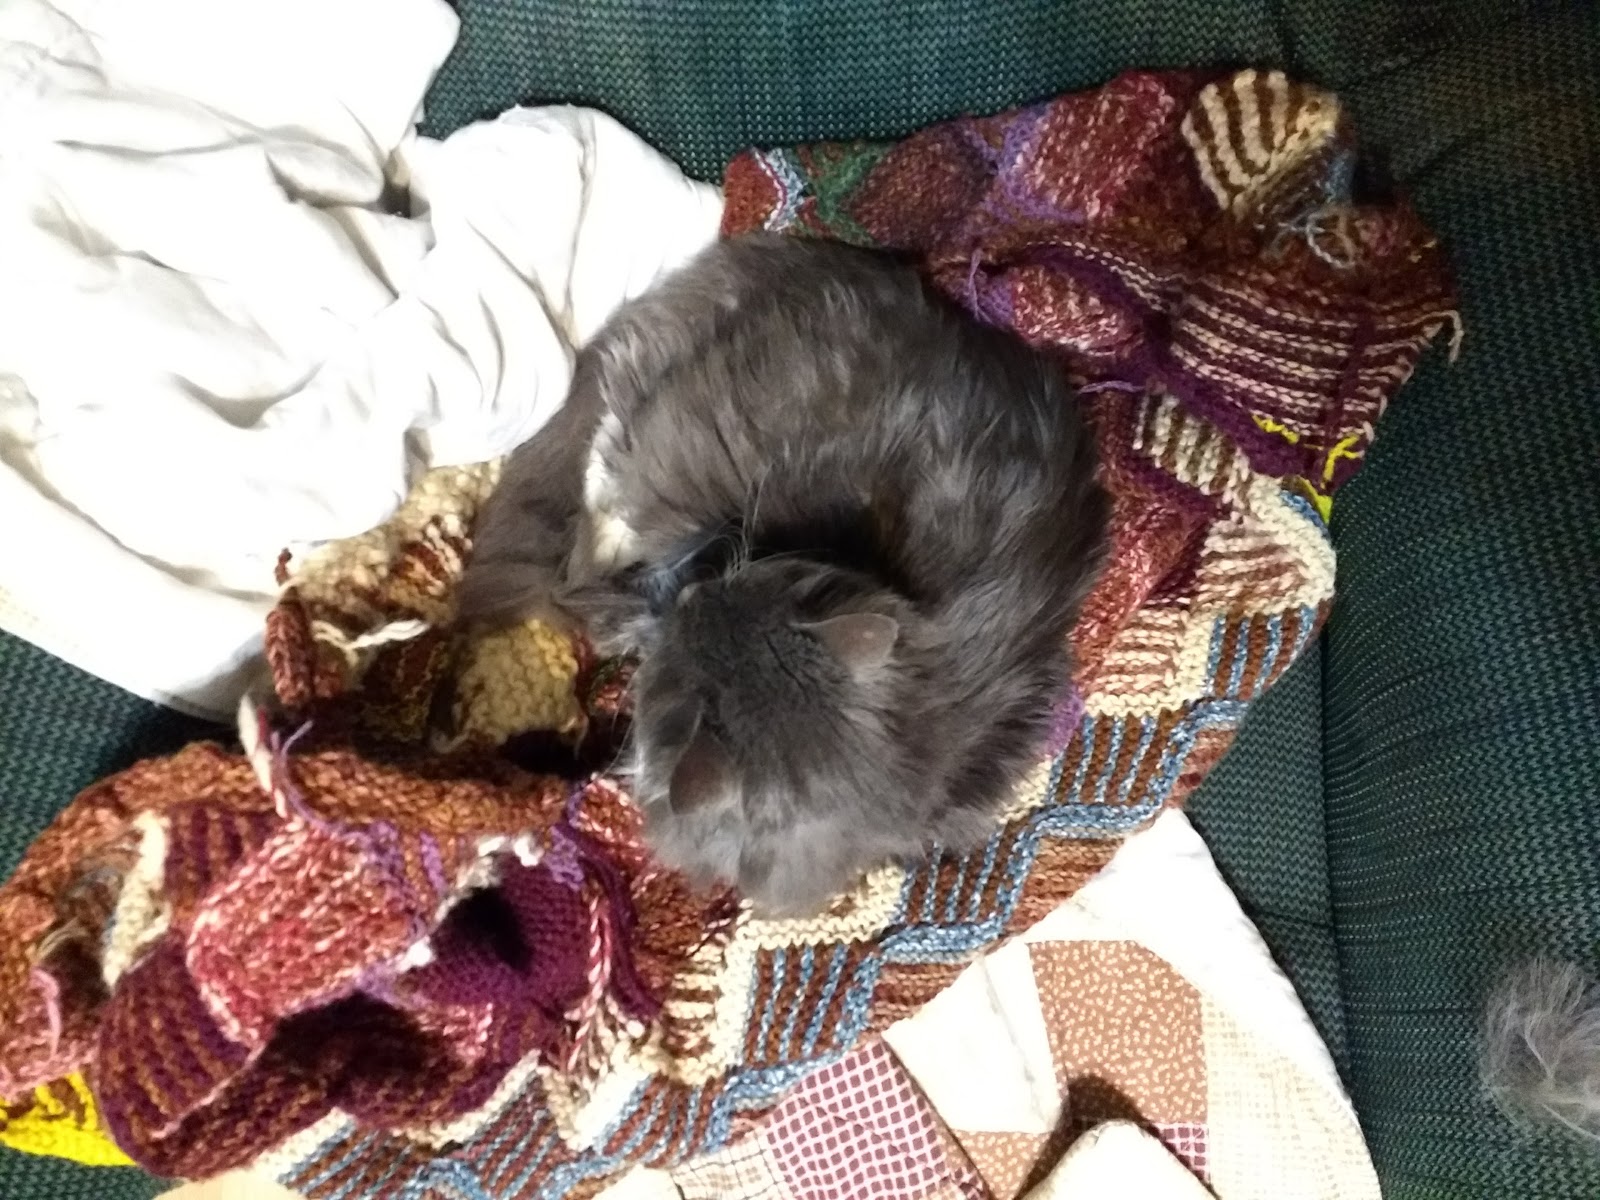
Maia claims all warm and well-trafficked areas as her own, regardless of season. I'm pretty sure this is the only actual photo I have of that house coat. 

Notes so You can Imagine the Shaping

I started with a longtail cast-on, measured to span my shoulders across my back, amounting to 7 squares of 8 stitches each, in super-bulky. I consciously started with the thickest yarn I had - both because I had the smallest amount of yardage in that weight, and because I wanted the structural stability at that load-bearing point. (Seemed reasonable at the time.) I worked the back panel for a decent span, being careful to reserve yarn so the front could match the back.

Cat feets!! And, starting this thing again.

From there, I picked up stitches along the cast-on, and added two 2-square front panels, with a gap for the neckline. I don't remember if I included a bit of stockinette before adding those panels - I remember having a little bit of neckline shaping, but I'm blanking on how that worked.

After an entrelac row or two, I added the other three panels to the front, so the two panels would meet - off-set from front-center because of the odd number of squares.

When all three panels were long enough, I joined the sides to the back panel, leaving arm holes. Then I knitted this many-stitch section as a single panel. It was bulky and awkward, but it went much more quickly since the finagling was over. Well, and not too bulky, since I was all out of the heavier yarns.

After the first few times I wore the coat, I picked up stitches in the arm holes and added shaping to make them a little less drafty. At that point, the only yarn I still had on hand in good quantities was my favorite of my first home-dyeing experiments: a deep raspberry color, in fine-weight plied Merino.

Then, I added front button plackets in the way I'd buttoned up the front of my rainbow shawl, a few years ago.

I don't have photos of that front closure, but look how pretty this shawl is! It uses the shaping and one motif from the Lafitte Shawl from Lost City Knits.

On a Disreputable Sunday in April 2014, I blew off four separate responsibilities and made something fun for my-own-self. Yarn is Hometown USA acrylic, super-bulky (I buy this yarn for Monmouth Caps). 

The new house coat was ham-handed compared to this, of course. But it was functional: it stayed in place, and was less bulky than a shawl or blanket, and kept me from catching cold during my (occasional) sedentary days in winter.  

Conflict:
Using any length of my Raspberry Merino on this project was an uneasy compromise: I wouldn't have to cut short lengths here, unlike in a longtail cast-on that I kept rethinking. But I _did_ have to cut it after the arm hole shaping was "good enough." Gulp. When I added shaping to the arm holes, I never wove in the loose ends, and they snagged and unraveled a smidge. It was never pretty.

In the meanwhile, I brought the house coat to show my Mom over Thanksgiving 2017 weekend - seven of us (three sisters, two* brothers, Mom, a family friend) hunted Black Friday sales at quilt shops. I didn't have anything specific in mind, but I wanted a little piece of fabric to line the neck to make it less itchy. I found a piece of flannel, and put it someplace "safe" in my yarn corner where I've been able to ignore it ever since. *missing a brother for extenuating circumstances

On that shopping excursion, my sister dubbed it the Hair Shirt - "Let me get this straight, you took yarn you hated and made yourself something ugly and uncomfortable to wear all the time." In the immortal words of Peter Faulk: Yes, you're very smart. Shut up.

And then seasons shifted toward spring again, and I wanted to start a new project. I still had a decent length of raspberry Merino available, and my husband was starting to sound envious of my lighter-weight long wool socks, also made with fine-gauge homespun wool. So I started those, despite anticipating that I would need more yarn. But! I didn't want to cannibalize the coat if I wanted to keep it for any length of time. But, why would I keep a coat I was unwilling to photograph? Oy.

Reset:  
I wore the house coat though the end of my winter knitting season. I wasn't willing to lose the warmth before then. But then Gulf Wars was coming. On a day that felt auspicious, I frogged this iteration and documented it as a part of the 100 Days of A&S challenge: Day 39, March 3, 2018.

Maia, guarding the yarn hoard, as is her right and duty.

Round 2: Cardigan. FIGHT!
Early March 2018

Looking at discrete balls of yarn all over again, I started to think in terms of showcasing the individual fibers. I've got some cool stuff here!

I found a cardigan pattern that had ribbing, then entrelac at the base, and then stockinette for actual shaping at the torso. Let's do it!

Pattern Rows and Fibers, starting at bottom hem: 
  • Plain ribbing - white MAC wool, black sheep from a coworker's family farm, Fluffy Goat from Belgutai, raspberry Merino 
  • Entrelac -  modern-dyed mixed-brown, alternating squares with one row of color: green is cheviot; MAC white in a finer ply; blue-pink on the needles is also from the MAC. 
Bottom hem of a new "Cardigan." I started with the same number of stitches as I had in the house coat, but this time constructed from the bottom, up. 
  • Ribbing at waist line - "hotchpot" spinning (re-spins from pencil rovings, roving yarns, first-round spinning projects), red/white MAC wool
Waist line of the "Cardigan," with ribbing inspired by two of the ribbing panels on the Eleanor of Toledo stockings (because I had it in my muscle memory and wanted something prettier than the bottom hem).

Conflict: 
I undermined this project before I even started. It wanted me to make three panels and then sew them together. I thought that sounded like "effort," so I cast-on the number I needed for the bottom hem, and ran with it.

After the waist-line ribbing, I was going to have to figure out where I needed to bind-off stitches to get back in line with the pattern. That would have been easy enough, but I kept putting it off. And then one day, I found (or maybe made up) an excuse, and assertively frogged the poor thing to put it out of its misery - while happily partaking of a Yuengling imported from Mississippi. 

Reset: 
And in this moment, it occurred to me that I've recently "discovered" light shawls. Shawls are so pretty, and they're ubiquitous on the "now what??" recommendations for knitters looking to expand skills past knit/purl design.

My rainbow shawl was a present from me to me. I even have a photo of me wearing it in public! It was my yarn-corner warmth for a few years. But it was bulky and not-subtle. See previous about complicated feelings toward homespun yarn - I'm not getting rid of it, but it's not my end-all. It's fine resting in the blanket storage for a little while. (Like how a parent will rotate toys for little kids - sometimes a project needs to "go away" for some time, and then it can be new and exciting again later.)

I made the rainbow shawl after a disastrous attempt to complete the Lafitte Shawl on lace-weight wool, complete with recommended beading. (Yeah, I picked something with beading and complicated charts as my first lace shawl _and_ first beading project. Fight me.) It was a beautiful mess - it was a clear fail because didn't lay out flat at all. But! It caught and threw light so amazingly. So Texture! Much Wow! I have no idea how I so brutally mangled that darling. Maybe I'll revisit it again someday.

More recently, I have started to consciously carry a lace-weight shawl when I'm not sure what the weather will be, but I anticipate a chill (ie not summertime). I wore it as a scarf at Crown Tourney in January 2018 and Gulf Wars in March 2018 (I have a photo somewhere from Pyro/ Caelin). And lately, it rests near my yarn corner, where it has been grabbed for this exact purpose a few times, now, too.

I don't have a photo of it by itself (yet), but here are its specs: Seth Shawl pattern, lace-weight alpaca from M. Xene (I might still have the tag somewhere - I try to keep them until I record the info somewhere re-findable,but I'm still hit-or-miss about both of those things).

Anyway: So. If I make a shawl/ infinity scarf, I _could_ plausibly use it in real life, based on real-time past behavior. Alright, that's a decent bet.

Round 3: Scarf/ Loop/ Whatever. FIGHT!!1!!

Theory #1: Flat Scarf 
Late March 2018

With the yarn all disintegrated from fabric again, I considered dividing the really heavy yarns from the really light yarns. Maybe make two scarves-?. That thought didn't last very long - I have bulk in the thick yarn, but not much yardage. So, I went up a needle size (5mm to 6mm), and jumped back in. 


Oohhhh, man, that's pretty. Isn't that pretty?!

Conflict: 
So Many Conflicts!!

I figured I'd work the squares in stockinette (and the triangles in garter). But, stockinette by itself is boooring! But, what pattern for the lace? I improvised one design and liked it well enough, but I didn't like it repeated exactly on the next row.

In the meanwhile, I'd started the Nakia shawl, which starts with a Provisional Cast-on. If I did that, I wouldn't have to play "yarn chicken" and risk having leftover yarns. If it came down to it, I could scrounge (or spin) more homespun for the graft if necessary. Great!

And finally, I had a color crisis: I didn't like the red/white in the same square as the brown/maroon. So, that row, i.e. more than 2/3 of the completed fabric here, was already "dead to me." 
Anyway, I didn't like the thought of picking-up stitches from a longtail cast-on pulled that taut. 

Reset: 
I think the width was okay (3 entrelac triangles at base, 24 sts). Maybe use a lighter yarn for the base triangles, so the heavier cast-on isn't overtaxed-? 


Theory #2: Infinity Scarf
Started: Early April 2018
Frogged: Late May 2018

Restarted with a Provisional cast-on. Alternated light-and-heavy strands in the entrelac rows - I did that last round, and liked it. And, from my experience on the blanket, I really liked the effect of changing one color every row to create a gradual color shift across the whole piece.

Ha. EUREKA! The cast-on row (green, acrylic) is over-taut, but that'll get fixed in post (hopefully, I'll have thick enough yarn at that point to do that smoothly).

Double garter entrelac rows alternating with lace (stockinette face) entrelac rows. The triangle rows and ends are all garter, for stability and simplicity. I'm "back burner" considering adding a crochet edge when this is all done, like I did on the blanket.

So far so good! (Famous last words.)

It occurs to me that I really want to map out the colors/fibers I'm using on this round, since I'm finally liking how this is working - and I still do want to track the unique yarns I have going on here. Text colors obvs don't strictly match the colors represented (but I did vaguely try to make it visually track). Rows, starting after the green cast-on, are:

Row 1:
  • White MAC wool (2-ply sport)
  • Home-dyed brown Merino (2-ply worsted)
Row 2:
  • White MAC wool (2-ply sport) 
  • Black sheep (2-ply sport) from a coworker's family farm; the black ran out at the end of the row and was supplemented with brown/pink MAC (4-ply sport)
Row 3:

  • Brown/pink MAC (4-ply sport) 
  • Pink re-spun Bernat (8-ply worsted) roving yarn (mostly wool; some other yarns in red/orange tones)
Row 4:

  • Pink re-spun Bernat (8-ply worsted)
  • White MAC (2-ply bulky/super bulky) 
Row 5:

  • White MAC (2-ply bulky/super bulky) 
  • Home-dyed brown Merino (2-ply worsted) I have a _ton_ of this yarn.
Row 6:
  • Home-dyed brown Merino (2-ply worsted) I have a _ton_ of this yarn.
  • Home-dyed denim-blue Merino, plied with white (8-ply sport) 
Row 7:
  • Home-dyed denim-blue Merino, plied with white Merino (8-ply sport) 
  • Wool of the Andes, "Firecracker" (2-ply super bulky)
Row 8:
  • Wool of the Andes, "Firecracker" (2-ply super bulky)
  • Home-dyed raspberry Merino, plied with home-dyed yellow Merino (8-ply sport)
After another two-ish hours of knitting, it's still panning out the way I need/want it to - yay!

Infinity shawl, covering the yarn I've set-aside for growing it, in the flat-bottom bag I've allotted for corralling all of it. This is the "RS" - the stockinette lacework is facing up. Maybe that'll be more apparent in later squares with better matched yarns. 

Conflict: 
I've been double-wrapping my yarn-overs for the lace squares. Someone with fancy credentials once wrote on a pattern that doing so makes for a bigger lace opening. I have never found that to be actually true - the extra slack does the opposite, in my experience. But, I ran with it for this iteration in case maybe the yarn gauge would make a difference. Yeah, no, you can barely see the lace holes. I'll see if there's a difference in the rows after the yellow/red I'm working on right now.

I've debated frogging this back, to correct that one point, but at the same time: I've already "killt" a few yarns in just this bit of knitting - and in at least three cases, the length that ended managed to do so at a convenient place in the pattern. So, frogging it now would disrespect that yarn's valiant closure. In the meanwhile, I have enough yardage in the finest yarns that I am able to hold plied yarns doubled and quadrupled where it needs to compete with my earlier spinning work with the heavier gauges.

Picking up on Row 7 because I frogged Row 8 after that last photo:

Row 7:
  • Home-dyed denim-blue Merino, plied with white Merino (8-ply sport) 
  • Wool of the Andes, "Firecracker" (2-ply super bulky)
Row 8 - new:
  • Wool of the Andes, "Firecracker" (2-ply super bulky)
  • White MAC wool (2-ply sport)
Row 9:
  • White MAC wool (2-ply sport) 
  • Yellow and Raspberry home-dyed Merino (4-ply fingering)
Row 10:
  • Yellow and Raspberry home-dyed Merino (4-ply fingering)
  • Green Cheviot (4-ply fingering)
Row 11:
  • Green Cheviot (4-ply fingering)
  • Purple/Blue MAC unknown fiber (oily) (4-ply fingering)
Row 12:
  • Purple/Blue MAC unknown fiber (oily) (4-ply fingering)
  • Pink re-spun Bernat (8-ply worsted) (4-ply fingering)
Row 13:
  • Pink re-spun Bernat (8-ply worsted) (4-ply fingering)
  • "Hotchpot" plied - whites and pastel tones respun from short bits (4-ply fingering)
Row 14:
  • "Hotchpot" plied - whites and pastel tones (4-ply fingering)
  • "Hotchpot" plied - dark tones respun from short bits (4-ply fingering)


Thick yarns are bunchy-looking: red and white square is the thickest. Thin squares are stretched all out: pink and purple, and squares on the needles, are the finest. 
And Then!!
I was starting to not be in love with this project. And then:

I found a cute pattern for a bottom-up tank-top, and it's super dorbs. And the lighter weight yarns (purple, red, yellow, green) would all be perfect for that.

And I have enough of my modern-dyed yarn to do something small-ish...

Updates as I come up with the next plan.


Next scheduled update will happen when one of the following is true:
  1. I frog this whole thing again, or 
  2. I get to another serious debate point, or 
  3. I get to another significant milestone in completion, or
  4. It's complete
So Say I: Elsa von Snackenberg. 05-21-2018. 

Thursday, May 10, 2018

Research: Medieval Egyptian Knitting

When Egyptians Walk

At some point in 2008, prior to LPT that year, I started digging for medieval-documentable sock patterns. I didn't expect it to be easy, but the knitters of the world haven't let me down yet - I found an excellent blog showing these stockings, a pattern, and construction, dye, and find notes.

In 2008, the page was completely beyond me. And then I practiced, and researched, and practiced, and researched some more.

I've written several sets of notes on my experiences with this project in general, and this pattern in specific, in several different places. As I work toward getting all my thoughts in one place, I'll try to do justice to this topic.

I'm setting up my notes in two separate blogs:
  • This one is research notes, suitable for reworking into classes or documentation on these projects.
  • The other one is real-time iterations I've created, with project photos. 

Research Notes
I feel like every time I try to say something definitive about these stockings besides what I’ve done, I find a new piece of information that contradicts, or at least spins, what I previously had.

The earliest known knitted items are thought to be (Crusades-driven) grave finds that made their way to Fustat, a major trade port in Egypt that was also the capital of the country through 1168 CE.

Later knitted items (13th century) were produced by Muslim knitters in Spain for Spanish Christian royal families – and those items were found buried in royal family tombs in monasteries. By the 14th century, knitted things were in common use all throughout Europe, made by all classes of people and constructed of all available fibers.

I’ve seen photos of two variations in this stocking style.

Commonalities: 

  • Definitely knitted (as opposed to questionable identifications involving fabric created via naalbinding)
  • Worked from the toe, up
  • Intricately color-worked
  • Cotton, dyed blue or bleached white
  • Same trade-routes/ discovery 

Differences:

  • Heels: afterthought vs short-row
  • Toe cast-on method: magic-loop vs ??
  • Color work banding: primarily white with color-work bands, and the other was entirely color-work in bands
Construction

Material
The yarn for the stockings and color swatch is Cotton Carpet Warp 8/4 from Halcyon Yarn. The colors are 104/58 Ivory and 117/5 Navy Blue.


Cotton was known to many cultures throughout our Period, including Europe. The original sock was constructed of cotton yarn in a yarn gauge close to 28 wraps per inch (wpi), which can be determined by measuring the number of stitches in a 1” by 1” square. For this project, I’ve used rug warp cotton in the same weight, which matched the needle size recommended in the pattern I used, in addition to being a common “sock weight.”

The original sock was determined to be made of cotton in off-white and dark indigo blue. Natural dyestuffs in Egypt would have been mostly limited to madder and indigo, and sometimes weld.

Cotton is a cellulose material, same as linen, so while it does accept dyes initially, most colors fades quickly to pale or pastel shades from washing and exposure to sun. The common exceptions to this general rule are indigo and madder which have unique properties and aggressive dyeing procedures.

Tools

Knitting needles feature a point at one or both ends and an even, smooth shaft. The earliest work of knitting would have been completed using double pointed needles, working in a spiral.

This project utilized a set of five dpns in size US 2, being 2.75 mm on the metric scale. Some care must be taken in the modern selection of knitting needles because at the fine and heavy ends of the spectrum, the US numbers do not share a 1:1 gradation relationship with the metric measurement.

A tool often referenced by researchers of Egyptian and folk knitting has a crochet hook on one end and a knitting needle point on the other. The modern name appears to be “knook.” I haven’t found an older name for the tool, nor an indication whether they were used in pairs or separately. They are mundanely sold individually or in a set of consecutive sizes.

This is an invaluable tool for knitting work for a few functions:

  • Pick up loops during the cast-on process - where loops are formed in the working yarn and transferred to the needle in a way that holds each loop separate from the ones before and after.
  • Pick up stitches that fell from a needle. A hook can grab the loose stitch and “walk” it back up the “laddered” gap left behind when it unraveled (imagine a run in nylon stockings).
  • Weave in loose strings at the conclusion of a project’s construction.

Techniques

I'll probably provide links for these, since they're common enough to modern knitters, but will not be familiar to non-knitters. The work here did not appear to be different in any discernable way from the modern finished result, even if the way of working it has changed over time - for example in the popular shift to Victorian (English, aka "throw") from Continental (European, aka "pick-up").


  • Cast on
  • Bind off
  • Stranded knitting
  • Number of unique pattern motifs.
  • Level of detail within each pattern motif.
  • Finish work beyond simply weaving in the tails.
  • Color work bands.
  • Color work from the toe-up - more complex than cuff-down because of the lack of stitches holding the needles in place while juggling two strands plus their tails.

Quality Notes

I occasionally catch myself musing about the quality of extant pieces - for all that they are visibly deteriorated from actual centuries of neglect and decay, the remaining fabric shows care and expertise. Factors I consider while in this headspace include:

  • Drape of the fabric. Tight knitting will hang more stiffly than loose knitting. Drape is directly affected by matching the needle gauge to the yarn gauge, and the tension used by the knitter during the process of working the pattern.
  • Texture of colorwork areas. Colorwork features loose threads floating on the wrong side of the work. If the threads are too taut or slack, one or both of the two stitches connected to them may sink or bulge.
  • Overall texture of the fabric. In any textile, changes in texture may be caused by changes in tension (perhaps looser when starting and tighter when stopping a work session), imperfections in the yarn, and careless pauses with a needle stabbed through the fabric. Consistency of texture within specific-pattern areas. For example, the Diapered Diamonds “pucker” differently than the Zig Zag and the straight-knit sections.
  • Pattern consistency. Subtle mistakes in following the pattern may manifest as anything from an odd patch in the work to a band that looks reasonable for the pattern but doesn’t match the rest of the section. Charted patterns are commonly worked using repeated rows, so if one row is off, it could shift the whole pattern.
  • Spaces between needles. In circular knitting using double pointed needles, twisted or ladder-like gaps may develop between the end of one needle and the beginning of the next. As the relative position of each needle in relation to the orientation of the fabric may not frequently (if ever) change during the course of a project, any holes or distortions may track along a straight line.
  • Seam where the pattern begins and ends. A charted colorwork pattern may not feature seamless joins since there is a definite beginning and end of the design. The point where one pattern row ends and another begins should have the same texture as the rest of the overall piece.
  • New color joins. There should be no right-side indication of where a new thread was introduced to the work. Incorrect color additions may feature the same textural imperfections as are found in colorwork areas.
  • Finish work. Loose ends should be hidden or arrayed decoratively.

References and Citations